Wednesday, April 20, 2011

Muse for a Year

Well, Today marks the end of a grand era for me. Today my last Master Muse tutorial was published on Tonya Davidson's blog. It was such an honor to have been asked to participate in this fabulous project. And amazing to have been in the company of my Sister Muses - Donna Penoyer; Patrik Kusek; Ruth Baillie; Anne Mitchell; Vickie Hallmark; Barbara Becker Simon; Angela Crispin; Kelly Russell and Robert Dancik. You can read a bit about all of us here and find links to all the other tutorials here. To date there are 48 fabulous projects online. But there are still a few more in the works from some of the other Muses.

I learn so much from these challenges I take part in. For the Muse project we were given specific materials to work with and often a particular theme to design within. It's exciting to work that way. The restrictions force me to get out of the comfy and familiar design nook in my brain, but the freedom lets me tip toe through the tulips of my imagination!

Photo by Drew Davidson

This past year I taught myself how to drill glass, make an articulated armature, pierce dry clay with a jewelers saw; play with color on metal and use a fired slab of metal clay to fabricate a faux gem.


I'm not done challenging myself though. I still have 36 rings to make and, based on a class project I uploaded to Flickr, have just agreed to design and make a workable perfume bottle by the end of June with some of my online friends. Who knows what other challenging situations will arise in 2012! I hope there are many.

Muse for a Year

Well, Today marks the end of a grand era for me. Today my last Master Muse tutorial was published on Tonya Davidson's blog. It was such an honor to have been asked to participate in this fabulous project. And amazing to have been in the company of my Sister Muses - Donna Penoyer; Patrik Kusek; Ruth Baillie; Anne Mitchell; Vickie Hallmark; Barbara Becker Simon; Angela Crispin; Kelly Russell and Robert Dancik. You can read a bit about all of us here and find links to all the other tutorials here. To date there are 48 fabulous projects online. But there are still a few in the works from some of the other Muses.

I learn so much from these challenges I take part in. For the Muse project we were given specific materials to work with and often a particular theme to design within. It's exciting to work that way. The restrictions force me to get out of the comfy and familiar design nook in my brain, but the freedom lets me tip toe through the tulips of my imagination!


This past year I taught myself how to drill glass, make an articulated armature, piece clay with a jewelers saw; play with color on metal and use a fired slab of metal clay to fabricate a faux gem.


I'm not done challenging myself though. I still have 36 rings to make and based on a class project I uploaded to Flickr, have just agreed to design and make a workable perfume bottle by the end of June with some of my online friends. Who knows what other challenging situations will arise in 2012! I hope there are many.

Monday, April 18, 2011

RAW #16 - Cherry Blossom Time

Cherry Blossom Time. Donation for Japan. In my shop later this afternoon.
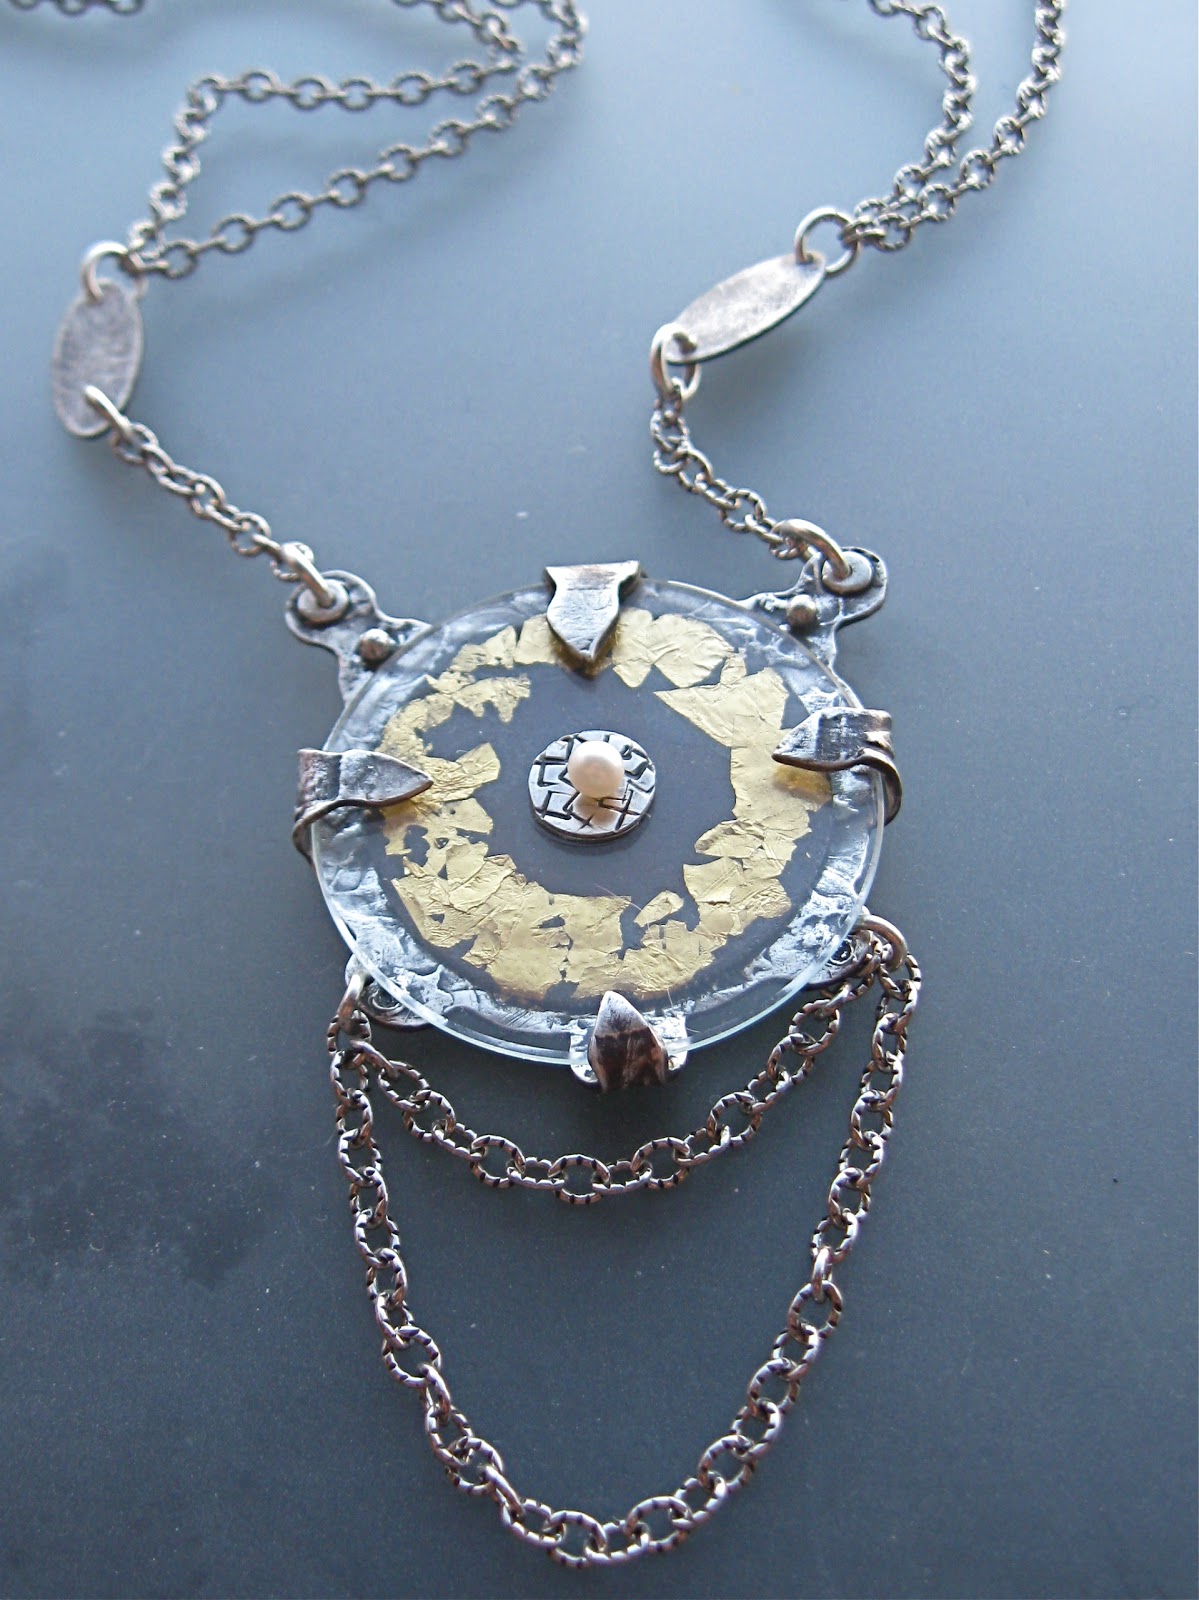
Copper, sterling silver, stick pearl bead, lab grown ruby crystal (bought mannnny years ago). Fabricated.


Doesn't seem like this should have taken me all day does it? There were soldering/flow problems, I wanted to attach each element separately to make sure that the placement was correct, there was time in the pickle, and oh yes. There were desperation moments when it seemed like the only relief was time spent with the Pregnant and In Jail ladies on cable.

Chris' Soldering Tool (nail tripod used to hold the platform down)

Lessons Learned:
• If you insist on saving money by using copper as a base, then you MUST spend more money in fuel by using propane/oxy. Not sure it's worth it. :\
• It's really easy to get perfect placement of prongs by sinking them into the solderite board while attaching and drilling holes in the copper to stand them up straight.
• I really DO like flowing the solder on a part before joining. No where near as difficult or fiddly as I've always thought.

• I appreciate all my friends who reminded me that there is a device known as a ring clamp. Makes so many operations so much easier.
• Don't clip and polish the prongs until the stone is in place. These are a tad short and hard to bend over fully.
• Again - "jewelers cement" never hurt anyone. And besides there's only a microscopic amount on the square wire platform that supports the ruby.

I apologize for the massively ugly wad of earthquake putty holding the ring upright.

Friday, April 15, 2011

Weekend Eye Candy - Random Beauty Edition


I've been swamped getting ready for Arrowmont on May 1st. Not that that's a good excuse for ignoring my faithful readers. Apologies.


I even forgot to post this week's ring. So here it is. Have a lovely weekend everyone. Hope to see some of you in Tennessee!

Monday, April 4, 2011

RAW #14

Sterling silver, fine siver, copper, mabe pearl. Fabricated.


Lessons learned:
• Practice is getting closer to perfect
• Flowing the solder on one element first and then re flowing to attach to the second element means so much less clean up!
• Old doggies learn new tricks all the time
* I really could use a hammer hand piece.


Lesson's I'd like to learn:
• How would someone with a fully equipped studio set and finish this?
a. hammer hand piece?
b. fine tune/file bezel height?
c. can it be finished with rouge or other after the pearl is in? I used a pumice rotary disk. How would you shine up the bezel?
d. should I ever take another picture on my hand? Look at those cuticles! No, don't.